Pergola materials and construction — the complete guide
Last updated: September 14, 2026
Key Takeaways
- For a simple pergola, post spacing commonly lands around 8 to 12 feet, depending on member size and material.
- Hate staining or sealing wood every 1 to 3 years? Pick a material that shrugs off neglect better.
- Need a fully weatherproof roof? A pergola is the wrong starting point.
- Those are not small details. They decide whether the pergola feels solid after the first storm.
Pergola materials and construction come down to one question: how do you build a structure that stays straight, sheds weather, and fits your space without becoming a maintenance headache? In this pergola materials construction — complete guide, I’m going to answer that plainly, because the wrong material choice or a sloppy frame layout is what makes most pergolas look tired before their time. Simple.
Who this guide is for — and what it assumes you already know
This guide is for a homeowner, builder, or remodeler who wants to understand pergola materials well enough to choose a structure that suits the yard, the climate, and the amount of upkeep they can live with. In this pergola materials construction — complete guide, I’m assuming you already know the basic shape of a pergola: posts, beams, rafters, and often a slatted top. I’m also assuming you can tell the difference between a decorative shade structure and a roofed patio cover. Need a fully weatherproof roof? A pergola is the wrong starting point.
A pergola is an outdoor structure, not just a garden feature, so the material choice is really a structural choice. A 4×4 post that looks fine in a photo may be too light for a long span. A pretty cedar beam may need more regular sealing than you expected. Aluminum can stay crisp-looking with little maintenance, but it behaves differently at connections and in wind exposure than timber does. Those are not small details; they decide whether the pergola feels solid after the first storm.
This pergola materials construction — complete guide is for people who want to make a sound decision, estimate the work, and avoid obvious mistakes. It is not for anyone hoping to improvise a large pergola over a hot tub, a second-story deck, or a freestanding structure in poor soil without checking loads and local code. Those cases move into engineering territory. If the pergola will attach to a house, support a fabric canopy, carry a vine-heavy trellis, or sit where snow or wind loads are significant, qualified design help is the right move. A decorative 8-by-8-foot shade frame in a sheltered yard is a different job from a 14-foot-wide span over an exposed terrace.
The rest of this article focuses on the practical parts that matter: what materials actually do in service, how the frame goes together, where people undersize members, and which details make a pergola last 5 years versus 25.
What is the best material for a pergola?
There is no single best material for a pergola; the right choice depends on climate, span, maintenance tolerance, and local code. In this pergola materials construction — complete guide, I would narrow the field to five common choices: pressure-treated lumber, cedar, redwood, aluminum, and steel, with vinyl or composite systems as niche options for lighter-duty builds. Unsure about loads, exposure, or fastening? Consult a qualified builder or structural professional and compare the material data and span guidance from the Wood Protection Association, the American Wood Council, and the manufacturer’s instructions.
Pressure-treated lumber is the budget workhorse, at least for many residential pergolas and within the limits of the design. It is usually southern pine treated for decay and insect resistance, and it makes sense for painted or stained pergolas where cost matters. The catch is movement: treated lumber can twist, cup, and check as it dries, especially in larger sections, so it is wise to consult a professional or use published span and fastening guidance before committing to a design. It also needs careful fastener choice because the treatment chemicals can be hard on ordinary steel hardware.
Cedar and redwood are the classic timber pergola materials. They are lighter, easier to work by hand, and naturally more decay resistant than untreated softwoods. Cedar is common for its balance of weight and appearance; redwood is attractive and visually warm, but less available in many markets and often more expensive. Both weather to a silver-gray if left unfinished. Want a crisp, finished tone for years? Plan on periodic sealing or staining, usually every couple of seasons depending on sun and rain exposure.
Aluminum works well where low maintenance matters. It does not rot, and it handles moisture much better than wood. Its weakness is rigidity in design: aluminum pergolas depend on properly engineered sections and connections because thin tubing looks clean but can flex if the frame is underbuilt. Especially on larger spans or louvered tops, that matters. Powder coating helps appearance, but the quality of the system depends more on wall thickness, joinery, and anchorage than on color.
Steel is the strength-first option. It is useful for slim profiles, long spans, and contemporary designs, but only if corrosion protection is handled properly. Galvanized or powder-coated steel can last well; neglected steel rusts from the first scratch in the wrong environment. I would not choose steel casually for a coastal site unless the coating system and detailing are right.
Vinyl and composite products can be fine for light-duty shade features, but I treat them cautiously for structural pergolas. They may suit decorative posts and beams in small assemblies, but they are not my first choice when the frame needs real stiffness. Want a timber look with less upkeep? Aluminum-clad systems or higher-grade timber are usually the more dependable path.
My position is simple: choose wood when you value warmth, easy field modifications, and a traditional look; choose aluminum or steel when you want straighter lines, lower upkeep, and a more engineered feel. But wood is wrong for someone who will never reseal it, and metal is wrong for someone who wants every cut made on site with ordinary carpentry tools. For more background on exterior wood durability, see the U.S. Forest Products Laboratory’s Wood Handbook and the American Wood Council’s span resources, which are more useful than marketing claims when you are comparing pergola materials construction choices.
How pergola construction actually works
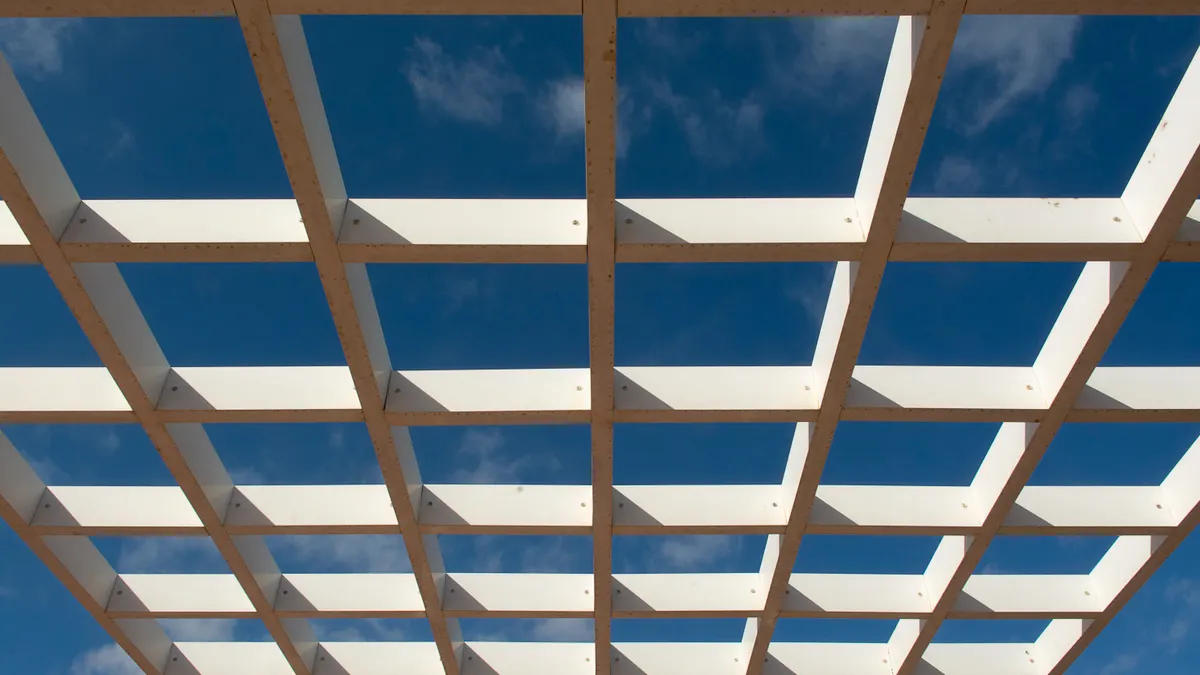
Pergola construction works by moving loads from the top slats into beams, then into posts, then into footings or a deck structure, and finally into the ground or the building structure. If any one of those stages is weak, the whole pergola starts to rack, sag, or wobble. The main idea is not complicated: create a square or rectangular frame, keep the posts plumb, keep the beam line level, and anchor the base against uplift and side sway.
Here is the basic order I would follow for a freestanding wood pergola, because sequencing matters more than people think:
- Set the layout lines first. Mark the outside corners with stakes and string, then confirm the diagonals are equal within about 1/8 inch on a small frame or as close as you can get on a larger one. Check that the rectangle is square before digging. If the diagonals are off, the roof slats will not line up cleanly and the whole frame will telegraph that error.
- Choose post locations that match the span, not the patio furniture. For a simple pergola, post spacing commonly lands around 8 to 12 feet, depending on member size and material. Check that your beam design can carry that span without obvious sag. If the layout asks a beam to do too much, you will see deflection at the center or oversized posts that still feel underbuilt.
- Build proper footings. Dig below local frost depth where frost applies, or to the depth required by local code, and use concrete piers or sonotubes sized for the load and soil. Check the top of each footing is at the same elevation and has the anchor hardware set correctly. If the footings vary in height, the posts will fight each other and the frame will need shimming that should never have been necessary.
- Install post bases and set the posts plumb. Use galvanized or stainless connectors approved for the material and exposure. Check each post is plumb in two directions before the concrete fully sets. If a post leans now, the beam line will be off later, and correction gets harder after the top framing goes on.
- Set the primary beams. Beams are the main horizontal members carried by the posts. In timber work, they may be doubled or built up from multiple plies. Check that the beams are level end to end and properly fastened with bolts or structural screws, not casual deck screws. If the beam sags between posts or the joint gaps open, the frame is telling you it is under-sized or poorly joined.
- Add rafters at even spacing. Rafter spacing on many pergolas lands in the 12-inch to 24-inch range, depending on design and desired shade. Check that each rafter seats consistently and projects equally beyond the beam if the design calls for an overhang. If one or two rafters sit higher, the top will read as wavy from below.
- Brace the frame against sway. Knee braces, hidden metal brackets, or engineered corner connections reduce racking. Check the structure does not wobble when you push a corner by hand. If it moves noticeably, the posts may be fine vertically but the frame still lacks lateral stiffness.
- Finish the joints and surfaces. Seal cut ends on treated lumber, apply finish to cedar or redwood if desired, and protect any exposed fastener holes. Check that water cannot sit in horizontal pockets or raw end grain. If you see standing water spots, those areas will age faster than the rest of the structure.
The part that often goes wrong is not the visible top; it is the base and the connections. A pergola can look straight from 20 feet away and still be badly built if the footings are shallow, the posts are not anchored, or the beams are fastened with the wrong screws. Another common failure is forgetting that wood moves. A tight joint in July may open by winter. That sneaks up on people. A smart build allows for movement without losing the structure.
For a wood pergola, I would use through-bolts, structural screws rated for exterior use, and connectors compatible with the timber treatment. For aluminum or steel, follow the manufacturer’s connection details closely. Those systems depend more on the specified fastener and bracket than many people expect. Swap in generic hardware, and you may lose the design capacity of the whole assembly. For general structural fastening guidance, the American Wood Council and the International Code Council are better references than guesswork, especially when pergola materials construction decisions affect attachment and span.
What to check before you buy material
Check span, exposure, and connection details before you buy a single board or post. Material choice gets expensive when people start with the lumber rack instead of the design, so the pergola materials construction plan should come first.
First, measure the opening. A pergola that sits over a 10-by-12-foot patio has very different structural needs from one that stretches across a 16-by-20-foot entertaining area. Longer spans mean larger beams, more posts, or a different material system altogether. Want a cleaner look with fewer posts? That is usually a reason to move toward engineered lumber, steel, or an aluminum system designed for the span.
Second, think about exposure. A sheltered courtyard in a mild climate is one thing. A rooftop deck, a coastal lot, or a site with frequent wind is another. Salt air punishes fasteners and coatings. Strong sun breaks down finishes. Snow load can turn a decorative slatted top into a real structural problem. In many places, local code or a structural table will tell you the design load assumptions, and that information matters more than any catalog claim.
Third, look at maintenance honestly. If you do not want to stain or seal wood every 1 to 3 years, choose a material that tolerates neglect better. If you love the look of cedar but hate maintenance, you are setting up a conflict with your future self. Fair warning.
Fourth, check the hardware system, not just the lumber. Exterior-rated connectors, corrosion-resistant fasteners, and proper post bases can make the difference between a structure that stays tight and one that loosens after one wet season. For treated lumber, the Wood Protection Association guidance and connector manufacturer charts are worth reading, and in the United States the American Wood Council span tables are a good reference point for structural thinking. For metal systems, the manufacturer’s installation instructions are not optional reading; they are the design. Need a second opinion? A local builder or structural engineer can help confirm whether the pergola materials construction details match the load.
Fifth, decide whether you want a kit, a hybrid build, or a full custom frame. Kits are often simpler and cleaner for small or medium spans, especially in aluminum. A hybrid approach, such as timber posts with a metal top frame, can work well if the details are deliberate. A full custom build is best when the space is awkward, the span is long, or the style has to match an existing house.
I would avoid buying material before you know the beam depth and post size you need. A pretty 6×6 post is not automatically enough. A small beam may look elegant but fail the stiffness test. This is where a generic article usually stays vague, and vagueness costs money.
Can I build a pergola myself?
Yes, you can build a pergola yourself if the design is modest, the site is straightforward, and you are comfortable doing accurate layout, post setting, and structural fastening. I would put the DIY line at a simple freestanding pergola of roughly 8-by-8 feet to 12-by-12 feet in a sheltered yard, using familiar materials and standard carpentry tools. Once the structure grows, or the site gets tricky, the job changes.
You can reasonably handle a small freestanding wood pergola if you can dig footings, mix and place concrete, read a tape accurately, and keep posts plumb. You can also handle many prefabricated aluminum systems if the manufacturer supplies the proper anchors and the base is level. What you should not improvise is a pergola that attaches to a house without checking ledger attachment, flashing, and local structural requirements. That detail matters because a failed attachment can damage the building, not just the pergola.
I would not recommend DIY for these situations: a pergola on a roof deck, a structure in high-wind country, a large span that needs engineered members, or any build involving heavy vines, shade sails, or a retractable cover. Those loads change the structure. A climbing wisteria, for example, can become a surprisingly heavy load over time. The frame that felt fine bare may not stay fine once plants mature.
The real DIY question is not “Can I put wood together?” It is “Can I build it so it stays square, anchored, and serviceable after weather and movement?” If the answer is yes, a DIY pergola is a fair project. If the answer is maybe, the right choice may be to limit the design to a smaller footprint or bring in a qualified carpenter, metal fabricator, or structural designer for the load-bearing parts. For permit and attachment questions, it is often worth checking your local building department before you start a pergola materials construction project.
My rule of thumb is simple: DIY the visible structure only when the hidden structure is conventional. If the foundations, connection details, and spans are standard, you can usually handle the rest. If any of those are unusual, that is where the job stops being a weekend build.
What are the mistakes people actually make?
The biggest mistakes are undersizing members, using the wrong fasteners, skipping lateral bracing, ignoring moisture management, and treating the pergola like furniture instead of structure. Each one has a different cost, and none of them is cosmetic.
Undersized posts or beams: This means the frame may look acceptable at first but will sag or feel springy across the span — choose larger sections, reduce span, or change materials. A beam that is too light often creates the “bowl” shape people notice from across the yard.
Generic fasteners in treated lumber: This means corrosion can eat away the connection and loosen the frame over time — use exterior-rated connectors and fasteners compatible with the preservative treatment. Ordinary bright screws are a bad bargain here.
No bracing at the corners: This means the pergola can rack sideways in wind or when someone leans on it — add knee braces, hidden brackets, or an engineered system with adequate lateral stiffness. A rigid-looking top does not automatically prevent sway.
Ignoring drainage and end grain: This means water sits where it should not, and rot starts at the weakest points — bevel cuts, seal exposed end grain, and keep posts off wet soil with proper post bases. Wood fails fastest where water lingers.
Assuming “cedar” means maintenance-free: This means weathering and checking still happen, and the wood will grey and open if left untreated — decide whether you want a natural weathered finish or a maintained finish and plan accordingly. Cedar resists decay better than many softwoods, but it is not immune to time.
Overcomplicating the top with no structural gain: This means you spend money on decorative trim while the frame still lacks stiffness — spend first on footing, posts, and beams, then on ornament. A heavy lattice on a weak frame is just an expensive problem.
The bad result is usually easy to spot: uneven beam lines, visible twist, posts that rock, fasteners staining the wood, or joints opening after the first season. If you can see those issues in the first year, the structure was not designed or detailed well enough. The fix is usually not paint; it is rebuilding the failing part. Ugly, but true.
What changes when the pergola is not a simple rectangle?
The standard approach needs modification when the pergola is attached to a house, spans a corner, carries shade fabric, sits in a windy location, or supports mature vines. Those situations change the loads and the detailing.
An attached pergola needs special care where it meets the building. The connection must be planned so water does not get trapped against siding or trim. A ledger attachment, flashing, and proper fastening into framing may be required, depending on the design and local rules. If that sounds like home-deck logic, it is, because the same mistakes show up: water behind the connection, soft attachment points, and fasteners into finish material instead of structure.
A corner pergola or L-shaped frame needs more thinking about how the beams meet. A simple repeated bay design may not fit. The load path has to be clear, or one side ends up carrying more than its share. And once the shape gets odd, the math stops being polite.