Pergola Lighting and Privacy Ideas for Outdoor Living Spaces
Last updated: September 14, 2026
Key Takeaways
- For a pergola under 12 feet wide, a pair of string-light runs or a single concealed perimeter strip is usually enough.
- Keep hanging points 12 to 24 inches from corners when possible so fabric does not scrape on edges.
- Very small pergola, under about 8 by 8 feet: Too many layers can overwhelm the space — Use one lighting source and one privacy treatment only, and consult a professional if you are unsure about attachment or load limits.
- Raise or lower a run by 2 to 6 inches, shift a curtain panel, or remove one fixture before adding more.
A pergola works best when it does two jobs at once: it makes the space usable after dark, and it gives you enough privacy to sit there without feeling exposed. I’m writing about pergola lighting privacy ideas outdoor living spaces for homeowners who already have a pergola, or are planning one, and want a practical way to make it feel like a room instead of a platform with posts.
Who this is for, and who should do something else

This is for a typical backyard pergola, usually 8 to 16 feet wide, where you want evening light, some screening from neighbors, and a layout you can still move through without ducking around hardware. I’m assuming you already know the basics: your pergola has posts, beams, and either open rafters or a more finished roof structure; you also know whether you have power nearby or will need low-voltage or solar lighting.
If your pergola is attached to a house and you want to tie into house wiring, that’s where the job stops being casual. Hardwiring often means a licensed electrician, a permit in some places, and a plan for wet-location fixtures rated for outdoor use. If your structure is older, has rotting wood, loose footings, or sagging rafters, fix that first. Lights and curtains will not rescue a weak frame.
The same caution applies if your pergola sits under mature trees or on a wind corridor. Anything that hangs—lanterns, shade cloth, fabric panels—needs solid attachment points and the willingness to remove it in a storm. I would not treat this as a good DIY project if you want to run 120-volt circuits through the structure, if the pergola is more than a simple freestanding frame, or if your privacy goal is to block a second-story view with tall fixed screens; consult a licensed electrician, a structural pro, or your local building department if any of that applies. That kind of screening can create wind load and may trigger local code or HOA issues.
For a normal backyard space, though, this is a very manageable project. A tape measure, ladder, drill, cable clips, and a plan for how the space is used after sunset are usually enough to get you to a good result.
What makes a pergola feel private instead of just covered?
A pergola feels private when the eye has somewhere to stop. That usually means a mix of vertical screening, partial overhead cover, and controlled light levels. The mistake people make is thinking privacy means enclosing all four sides. In a 10-by-12-foot pergola, that often makes the space feel smaller, hotter, and darker than it needs to be.
I think in layers. Start with the view you want to block. If the neighbor’s kitchen window looks directly into your seating area, focus on the side facing that window. A 5- to 7-foot side screen, placed where sightlines cross, often does more than draping fabric on every edge. If the problem is overhead visibility from a deck or bedroom above, a slatted top treatment, reed roll-up, or tensioned outdoor shade fabric can soften the view without turning the pergola into a box; consult a professional if you need to address wind load, attachment details, or local code.
Materials matter. Outdoor curtains need corrosion-resistant hardware and hems that will not flap like sails. Privacy slats, lattice, and trellis panels give more structure, but they also collect dust and pollen and can make a tight pergola feel busy. If you want the cleanest look, I would choose one strong privacy move per side, not three weak ones stacked together. Too many layers fight each other.
Light changes privacy too. Bright bare bulbs make people feel more visible, even if the screening is adequate. Warm, shielded light in the 2700K to 3000K range usually feels calmer than cool white, and dimmable fixtures help the space read as intentional instead of overlit. If the pergola is small, avoid putting bright lights at eye level on every post; that turns the whole structure into a stage set.
The rule I use is simple: privacy should block direct sightlines, not daylight itself. If your solution kills the breeze or creates a cave at 7 p.m., it has gone too far.
How do you light a pergola without making it look cluttered?
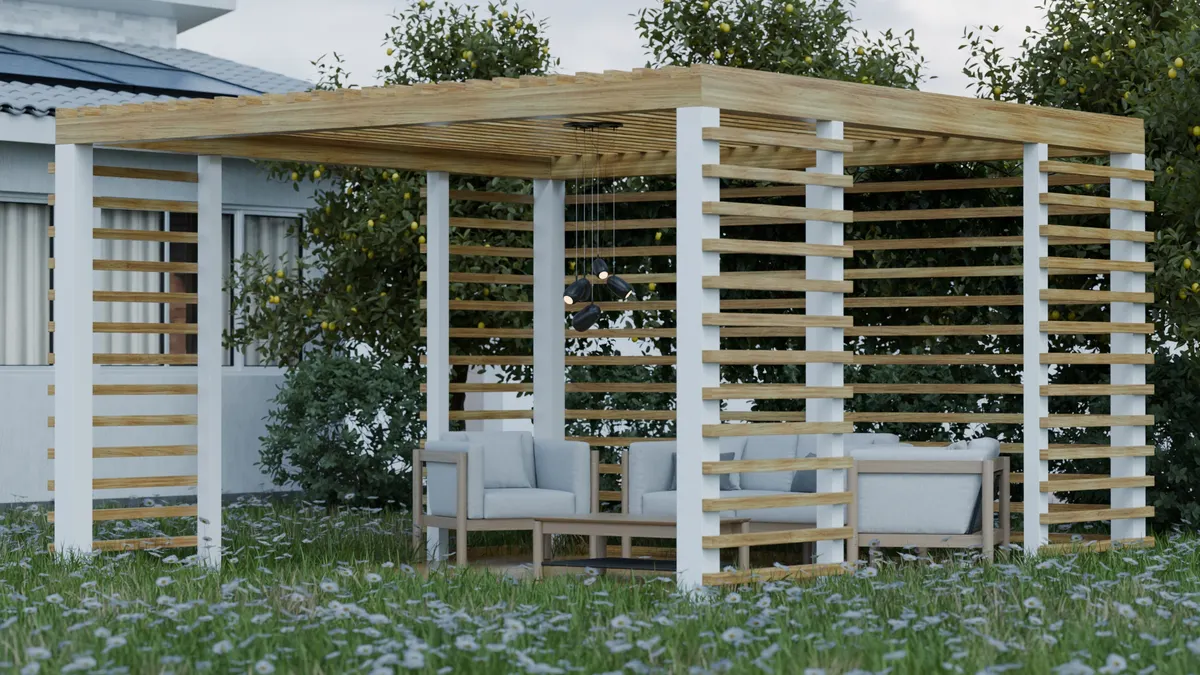
You light a pergola by choosing one primary layer, one accent layer, and a clear power plan. That’s the cleanest way to keep the structure from looking like a festival tent.
Start with task light if the space is used for eating. A table that seats 4 to 6 people usually benefits from soft overhead light centered over the table rather than along the rafters. String lights can work, but only if they are installed with enough sag control that they don’t dip into headroom. As a rule of thumb, I want the lowest point of any hanging light well above head height; in practical terms, that means no dangling bulbs where people will brush them while standing or moving chairs.
Then add ambient light. This is the wash that makes the whole pergola visible, often done with linear LED strips hidden on top of beams, small uplights aimed at posts, or lantern-style fixtures hung high enough to stay out of the way. I prefer hidden sources to exposed bulbs when the pergola is also a privacy space. Hidden light gives the room shape without exposing the whole interior to outside view.
Accent light should be limited. One or two points of light on a plant wall, a textured screen, or the edge of a post can add depth. More than that, and the scene starts to look busy. Outdoor spaces are sensitive to visual clutter because you see them from both inside and outside the structure.
The most effective lighting plan also respects glare. If you can see the bulb filament from your seat, or from the neighboring yard, the fixture is probably too bare or too low. For a pergola under 12 feet wide, a pair of string-light runs or a single concealed perimeter strip is usually enough. Larger pergolas can take more, but only if the wiring and attachment points are planned before you hang anything.
What should I install first: lights, screens, or shade?
Install structure first, then screening, then lighting. That order avoids the classic mistake of drilling around finished fabric or trying to route wires after you have already mounted curtains.
Here is the sequence I would follow for a standard freestanding pergola:
- Measure the pergola span and note the sun and sightlines. Record the length of each side, the height of the beams, and the direction of the strongest evening glare or neighbor view. Verify the posts are plumb and the beams are sound. If the frame is racked, even by a small amount, screens and string lights will look crooked.
- Choose the privacy zone first. Decide which side needs screening and how much. A 6-foot privacy panel on one side may be enough if the other sides are open to a garden. Verify that the chosen side does not block an access path or create a wind tunnel. If it does, move the screen or shorten it.
- Set the mounting points before buying fixtures. Mark beam centers, post faces, and any places where cable clips or curtain rings will land. Keep hanging points 12 to 24 inches from corners when possible so fabric does not scrape on edges. If you cannot find solid attachment points, the plan needs revision.
- Run power or choose a low-voltage path. If you are using low-voltage outdoor lighting, keep the transformer in a dry, accessible location and route cable where it will not be pinched by furniture. Verify the cable length reaches without tight pulls. A strained cable usually means the layout is too ambitious.
- Install the privacy elements first. Mount slats, panels, curtains, or shade cloth before the lights so you can see the finished silhouette. Verify the fabric hangs straight and clears the ground by at least a few inches if it should move in the wind. If it drags, it will collect dirt and fail early.
- Add the main lighting layer. String lights or linear LEDs should be installed with even spacing and supported at each run end and any midspan sag point. Verify that no socket, connector, or plug is exposed to direct rain unless it is rated and positioned correctly. If bulbs appear uneven or the wire droops into head height, adjust now.
- Test the scene at dusk, not noon. Check the space when the outdoor light is fading. Look for glare, dark corners, and reflections in nearby windows. If the screen hides the view during the day but still leaves the seating area bright and exposed at night, you need a dimmer, shield, or a different fixture angle.
- Make one adjustment at a time. Raise or lower a run by 2 to 6 inches, shift a curtain panel, or remove one fixture before adding more. Verify each change by standing inside the pergola and viewing it from the yard. If the solution gets busier every time you fix one problem, you are overbuilding it.
The good result is not the one with the most hardware. It is the one where the seating area feels enclosed enough to relax, but still open enough to breathe and move.
Which privacy ideas work best on a pergola?
The best privacy ideas are the ones that answer a specific sightline problem without turning the pergola into a wind trap. I favor solutions that can be opened, moved, or thinned out seasonally.
Outdoor curtains are the most flexible. They soften hard edges and give you instant control, especially on one or two sides. They are not ideal if your pergola is very windy or if you hate fussing with tiebacks every time you sit down. Curtain rods and tracks also need stout support; flimsy hardware sags fast.
Lattice and trellis panels are better when you want a cleaner architectural look. They accept climbing plants, which can eventually create a living screen. That is a slower solution—think one or more growing seasons, not a weekend—but it can be the nicest if you are patient. The trade-off is maintenance. Plants need pruning, and dense growth can cut airflow.
Bamboo or reed screens are light and inexpensive in the broad sense, but they age unevenly in strong sun and rain. I would use them as a temporary or low-commitment option, not as the final answer on a structure you want to last for years.
Shade sails and outdoor fabric panels work when the privacy issue is also a sun issue. They can block higher sightlines and soften the top view from upper floors. The drawback is tension. A loose sail looks careless; an over-tight one can stress attachment points. On a pergola with 8-foot posts, I would keep fabric high enough that people do not clip it with their heads or shoulders.
If you want the least visual clutter, plant privacy can be the best long game. A row of tall containers with ornamental grasses, hedging shrubs, or columnar evergreens gives you screening that does not look like a wall. The catch is time and water. That is not a same-day fix.
Common mistakes people make with pergola lighting and privacy
The first mistake is hanging too many small things. A few lanterns, a curtain, a string light run, a screen, and a banner can add up to visual noise. The consequence is a space that feels smaller than the pergola actually is. The better move is to choose one dominant privacy element and one lighting style, then stop.
The second mistake is treating glare as decoration. Bare bulbs at eye level are harsh, especially when the lights are visible from the next yard or from a dining chair. The consequence is eye fatigue and a space that looks brighter than it feels. Shield the bulbs, raise the run, or switch to a concealed source.
The third mistake is using indoor fabric or cheap fasteners outdoors. Consequence: mildew, fading, rust, and fabric that tears at the hem in wind. The correct alternative is outdoor-rated material and corrosion-resistant hardware, even if the initial setup feels more expensive in time or money.
The fourth mistake is blocking every side equally. People often cover the whole pergola because they want privacy, then wonder why the space feels hot and gloomy. The consequence is poor airflow and less use on warm evenings. Screen the side with the actual problem first, then add only what you still need.
The fifth mistake is ignoring access for cleaning and maintenance. Outdoor lights collect dust, insects, and pollen; fabric needs periodic washing or replacement; climbing plants need pruning. If you cannot reach a fixture or panel with a ladder, it will become a nuisance. Plan for maintenance every few months, not once a year.
When does the standard approach not apply?
The standard approach does not apply when wind, code, or structure changes the job. In those cases, the right answer is to simplify or stop.
Attached pergola with hardwired lighting: This means house wiring, junction boxes, and wet-location rules may apply — Use a licensed electrician and check local requirements before you cut into anything.
Visible rot, loose posts, or cracked beams: The frame may not support hanging loads safely — Repair the structure first; lights and curtains are not a fix.
Second-story sightlines from neighbors or a deck above: Simple side curtains will not solve the problem — Use taller screens, overhead fabric, or planting, and expect a more custom layout.
Frequent high wind or exposed rooftop conditions: Fabric panels and loose lanterns will fail early — Choose rigid slats, shorter screens, or removable seasonal elements.
Very small pergola, under about 8 by 8 feet: Too many layers will overwhelm the space — Use one lighting source and one privacy treatment only.
Poolside pergola or any wet area: Electrical safety and fixture ratings matter more than style — Keep fittings rated for outdoor use and follow the manufacturer’s clearance and mounting guidance.
I also think standard advice breaks down if you want total privacy. A pergola is an in-between structure, not a sealed room. If you truly need isolation, a screened porch, fence, or enclosed pavilion may be the better tool. That is a design decision, not a failure.
How long does it take, and what should the finished space feel like?
A simple pergola makeover can be done in a weekend, but a good result often takes one round of installation and one round of adjustment after dark.